Monday, May 18, 2015

Paavakkai (Bitter gourd) Kuzhambu/Pulusu

Source:

Mrs. Shantha Krishnan


Ingredients:

Bitter Gourd (Pavakkai) - 1 (chopped)

Small Onions (Shallots) - 10 or 12 (peeled)

Sambhar Powder - 1-1/2 to 2 tsp

Grated Coconut - 1 tbsp

Tomato - 1 (chopped)

Thick Tamarind Extract - 1 tsp (or tamarind gooseberry sized)

Mustard Seeds - 1/2 tsp

Asafoetida/Perungayam/Hing - 1/4 tsp

Curry Leaves (Karuveppillai) - 1 sprig

Big Onion - 1 (chopped)

Rock Salt - 1 tsp (or as needed)

Oil - To fry

Jaggery - 2 tsp


Method:

1.  Heat 1 tsp of oil in a kadai and fry the small onions, chopped tomatoes, grated coconut, sambhar powder, and tamarind for 2 minutes.  Switch off the flame, allow to cool, and grind to a smooth paste adding no water or very little water.

2.  In a kadai, heat 5 to 6 tsp of oil and add mustard seeds, hing, and curry leaves.

3.  When the mustard seeds start to splutter, add the chopped big onion and chopped bitter gourd.  Fry well until half cooked.

4.  Now, add the ground paste and fry well for around 4 to 5 minutes until oil separates on the sides.

5.  Add salt and jaggery and mix well.  Allow to boil for a minute more.  Add water and cook to desired consistency.

6.  Serve hot with steamed rice.


My Notes:

1.  Sundaikkai can be used instead of pavakkai.

2.  After using the kuzhambu once, if anything is left over, boil the remaining until it thickens well (sunda vaikkavum) and use the next time you need or store in fridge until use.  It stays good for at least 1 week when stored in fridge.

3.  Adjust salt, sambhar powder, and jaggery according to your taste.

4.  I make this kuzhambu to a thick consistency.  Add water according to your needed consistency.  Do not dilute the kuzhambu too much.

Friday, May 15, 2015

Rava Kaara Kozhukattai (Semolina Dumplings)

Source:

Mrs. Revathi Shanmugam


Ingredients:

White (Bombay) Rava - 1 cup

Bengal Gram Dhal (Kadala paruppu) - 1/2 cup

Toor Dhal - 1/2 cup

Oil - 4 to 5 tsp

Mustard Seeds - 1/2 tsp

Carrot - 1 (chopped) 

Onion - 1 (chopped)

Cabbage (shredded) - 1/2 cup

Rock Salt - 1 to 1-1/2 tsp (or as needed)

Grated Coconut - 2 tbsp

Red Chillies - 6

Turmeric Powder - 1/4 tsp


Method:

1.  Wash and soak the dhals separately for a minimum of 1 hour in just enough water.

2.  Drain the excess water from the soaked dhals.  Grind each of the soaked dhals separately to a coarse paste sprinkling little water for easy grinding.

3.  Just before grinding the dhals, soak rava in just enough water.  After the dhals are ground, drain excess water from rava and give a quick run in the mixie.

4.  Grind together red chillies, turmeric powder and salt.

5.  Mix together well the coarsely ground dhals, rava, and the ground red chilly paste to a batter.  The batter should be of an adai batter consistency.  Add water if necessary to achieve the desired consistency.

6.  Heat oil in a kadai.  Splutter mustard seeds and then add the chopped onions, carrots, and cabbage and fry for 2 minutes.

7.  Add the rava-dhal batter and keep mixing until all the moisture is absorbed.  Make sure no lumps are formed.  When it starts to leave the sides and comes together to form mass, switch off the flame.  Allow to cool.

8.  Grease your hand with little oil.

9.  When the mixture is warm, take small portions and press between the palm and fingers into cylindrical shapes to form pidi kozhukkattais.  Repeat the same for the entire mixture.

10.  Arrange the kozhukkattais in a plate and steam in a cooker or a vessel (with water in the base of the vessel) for 10 to 15 minutes in medium flame.

11.  Serve hot with a desired chutney or pickle of your choice.

This makes a healthy breakfast dish that is steamed and is a well-balanced diet containing carbohydrates, proteins from the dhals, fiber content and vitamins and minerals from the vegetables.  The rava dumplings can be made for dinner too when you want a simple, steamed, easily digestible menu just before going to bed.


My Notes:

1.  Drumstick leaves can be used instead of the vegetables.

2.  A pinch of cooking soda can be added in the batter to get more softer kozhukkatais.  I did not use soda.

3.  Any vegetables of your choice can be added, viz., green peas, capsicum, beans, etc.

4.  I served this dish with a garlic chutney.  Onion or tomato onion chutney is also a good accompaniment.

Wednesday, May 13, 2015

Pineapple Gateau (Pineapple Fresh Cream Pastry Cake)

Source:

Adapted from Cook Like Priya


I used a fatless (i.e. no butter/no oil) sponge cake base to make this cake.  Any sponge cake (viz., normal or eggless) base of your choice can be used.

Fatless Sponge Cake

Yield:  An 8 inch cake cut into 3 layers

Servings: 10 to 12 generously


Ingredients:

All purpose flour (maida) - 1-1/4 cups (150 gm)

Sugar (granulated/powdered) - 3/4 cup (150 gm)

Eggs (large) - 5

Baking Powder - 1/2 tsp (2.5 gm)

Baking Soda - 1 pinch

Salt - 1 pinch

Vanilla Extract - 1 tsp

Pineapple Essence - 1 tsp


Method:

1.  Preheat oven to 180 degrees C or 350 degrees F for 10 minutes.

2.  Grease an 8" baking tin with oil and line the sides with parchment or butter paper about an inch higher than the cake tin and also line the base with the same.  Set aside.

3.  Sieve flour, baking powder, baking soda, and salt together until well incorporated.  Set aside.

4.  In a bowl, beat the eggs, sugar, vanilla and pineapple essences.  Beat for about 5 minutes until soft peaks form.

5.  Gently add the sifted flour mixture little by little into the beaten egg mixture until well incorporated.  Take care not to over mix.

6.  Pour the cake batter into the greased cake tin and bake for 30 minutes at 180 degrees C.

7.  Remove from oven and allow the cake to cool for 10 minutes.  Later, invert the cake onto a cooling rack and let the butter paper remain intact.

8.  Once the cake is completely cooled down, remove the butter/parchment paper.

9.  Cling wrap the cake and refrigerate until use.

10.  When about to use, remove the cling wrap and cut into layers.  I sliced into 3 perfect layers and placed them separately on plates.


Pineapple Soaking Syrup


Ingredients:

Pineapple Syrup - 1 cup (the syrup in the the tinned pineapple can)

Powdered Sugar - 4 to 5 tbsp

Pineapple Essence - 2 tsp

Method:

Mix all the ingredients in a bowl and set aside until assembling process.


Whipped Cream Frosting

Ingredients:

Cold Non-dairy Whipping Cream - 2 cups

Icing Sugar - 1/2 cup

Pineapple Essence - 1 tsp


Method:

1.  Freeze the bowl with whisk attachment for at least half an hour before making the whipping cream.

2.  Beat the cream at high speed for 2 minutes and then slowly add the essence and the icing sugar.  Beat until stiff peaks are formed.  Keep refrigerated until use.


Assembling the Cake

1.  Take the cake out of the fridge and unwrap the cling film.

2.  Place on a cake stand and mark a line with a colored toothpick tip (dipped in a bright food color) from top to bottom or vice versa at any of the points of your choice.  This helps in placing back the layers after filling in the same style as the original baked cake so that a uniform level is achieved.

3.  Slice 2 or 3 layers of the cake horizontally and place them on different plates aside.

4.  On a cake board, apply about 1 tsp of the cream in the center and then place the topmost layer of the cake on it.

5.  Drizzle one-third of the prepared pineapple soaking syrup liberally all over this cake layer and let sit for a few minutes until the syrup is fully absorbed.

6.  Now, add a big dollop of whipped cream on the soaked cake layer and spread with a spatula all over uniformly.  Place chopped pineapple (tinned) chunks all over the spread whipped cream.

7.  Place the middle layer of the sliced cake over this and repeat the process of soaking, spreading the whipped cream, and placing the pineapple chunks.

8.  Finally, place the bottom most layer of the sliced cake with the bottom side facing upwards.  This technique of placing the layers is called upside down technique.  Drizzle the soaking syrup all through and allow it to absorb.

9.  Then, spread the whipped cream all over the top of the cake and also on the sides and decorate with pineapple (tinned) pieces.  I used some store bought marshmallows also to frost and decorate the fresh cream pineapple pastry (gateau).

10.  Refrigerate the pineapple gateau for at least 30 minutes to set.

Once ready, cut, serve, relish, and enjoy!!!

This is a classic cake and just can't be stopped with one bite.


My Notes:

1.  I used non-dairy whipping cream for this gateau.  You can opt to use dairy cream (viz., Amul Whipping Cream).  Getting stiff peaks is difficult in Indian climatic conditions.  So, the cream can be stabilized with gelatin or agar agar powder to get stiff peaks.  Dissolve 1 tsp of gelatin/agar agar powder in 2 tsp of water and leave it for 5-10 minutes.  Once bloomed, add while whisking the whipping cream to stabilize it.

2.  I used the whipped cream itself to frost the cake.  Buttercream can also be used to frost the cake.

3.  If using fondant toppers, place them on the cake just before use.  They tend to run out of colors or become soggy and out of shape because of the moisture of the cream. 

Thursday, May 7, 2015

Suraikkai Kofta Curry

Suraikkai in Tamil
Churakka in Malayalam
Sorakaya in Telugu
Lauki in Hindi
Bottle Gourd in English

Adapted from Gayathri's My Home Kitchen

Ingredients:

For Koftas:

Bottle Gourd - 1/4 kg

Bengal Gram Flour (Kadala Maavu/Besan) - 1/2 cup

Cornflour - 1 tbsp

Salt - As per taste

Turmeric Powder - 1/4 tsp

Coriander Powder - 1/2 tsp

Cumin Powder - 1/2 tsp

Red Chilli Powder - 1 tsp

Cumin Seeds/Saunf - 1/2 tsp

Oil - For frying koftas

For Gravy:

Onion - 1

Tomatoes - 3

Garlic - 2 flakes

Ginger - 1 inch piece

Tomato Ketchup - 1 tbsp

Chilli Sauce - 1 tsp

Red Chilli Powder - 1/2 tsp

Cloves - 2

Cinnamon - 1 inch piece

Nutmeg powder - 1/4 tsp (optional)

Cumin Seeds/Saunf - 1/4 tsp

Fresh Cream - 2 tbsp

Salt - As per taste

Ghee - 1 tbsp

Fresh Coriander Leaves (Chopped) - 1 tbsp

Cashew/Til/Khus Khus Powder - 1 tsp (optional)


Method:

1.  Wash the bottle gourd, peel the skin, and grate it.

2.  Mix grated bottle gourd and all other ingredients listed for koftas (except oil).  Mix well to form a loose dough.

3.  Heat oil in a kadai.  Make small balls of the dough above and deep fry them until golden brown.   Keep aside.

4.  Grind together chopped onion, garlic, ginger, and tomatoes to make a paste.

5.  In a pressure pan, heat ghee.  Add cloves and cinnamon.  Splutter cumin seeds/saunf.

6.  Add the ground mixture and mix well.

7.  Add salt, red chilli powder, tomato ketchup, chilli sauce, cashew powder, and nutmeg powder.  Mix well.

8.  Close the lid of the pan and pressure cook until 1 whistle or for 5 minutes.

9.  Allow to cool and then open the lid of the pressure pan.  The gravy would have cooked.

10.  Now, switch on the stove, slide in the fried koftas gently and bring to a boil with lid closed (do not put the weight on).

11.  Open the lid and drizzle in the fresh cream.  Switch off the flame, transfer to a serving dish, and serve hot with finely chopped coriander leaves as a garnish.

Enjoy this suraikkai/bottle gourd kofta curry with rotis, steamed rice, fried rice, or dosas.

The deep fried koftas can be had as such too.  They are crispy on the outside and soft inside.  You can't stop yourself gobbling them off before you add them to the gravy.

I used pressure pan to make the gravy.  The same can be done in a kadai also.


Wednesday, May 6, 2015

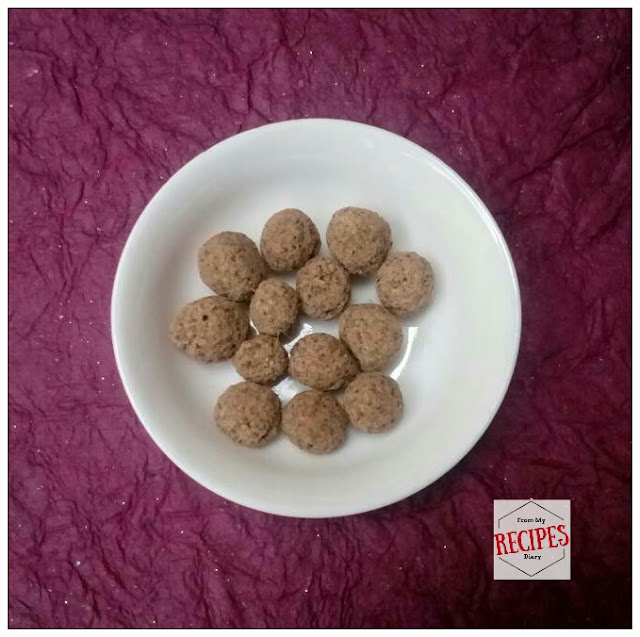
Narthangai Urundai/Digestive Churan Goli

One of my aunts is in Tirunelveli who does traditional recipes of the South Indian Cuisine and she is the go-to person for any cooking help.  We visit her place often and it is always a pleasure to be with them.  When we had been to visit them recently, I happened to meet my aunt's co-sister who stay to their next door, Vasantha aunty, and she gave me a big pack of narthangai urundai (the churan golis) which she had freshly prepared herself, inspite of her old age.  Now that these things have become rare to get hold of, I readily accepted it and asked her for the recipe too as such traditional recipes (treasures rather) we can learn only from our elders.  She happily shared her recipe and has been my to-do recipe every year during the summer time though these are not to be dried directly under the sun.

Ingredients:

Sukku (Dry Ginger) - 100 gm

Omam (Ajwain) - 100 gm

Milagu (Pepper) - 100 gm

Seeragam (Cumin Seeds) - 100 gm

Perungayam (Asafoetida) - 100 gm

Indhuppu (Himalayan Salt) - 100 gm

Podi Uppu (Powdered/Table Salt) - 100 gm

Lemon - 40 (medium sized)


Method:

1.  Sun dry all the ingredients except lemon.  They should be crisp enough to be easily powdered.

2.  Powder them separately and keep aside.

3.  Wash and wipe the lemons.  Cut them into halves and squeeze the juice out of them.  Strain and remove seeds.

4.  In a bowl, mix all the powdered ingredients and the squeezed lemon juice until combined together.

5.  Keep aside undisturbed and closed.

6.  After 1 or 1-1/2 days, the mixture would have solidified a bit to a consistency that would enable to make small balls (urundais/golis).

7.  Roll small sized balls (urundais) and allow to dry completely in shade itself (do not sun dry).

8.  Store in airtight containers.  They have shelf life of more than a year if stored properly.


These balls (urundais/golis) are very handy when one suffers from indigestion or gas trouble.  They provide immediate relief from stomach pains and is a very good home remedy for such gastric issues.

Though the name is Narthangai Urundai, generally lemons are used to make these digestion enhancers.  If Narthangai (Citron) is available, its juice can be used to make this recipe.  This can be considered as homemade Hajmola (with a different and natural flavor) to remedy your digestive problems.

Saturday, May 2, 2015

Apple Pudding

Source:

Mrs. Meera Sathish


Ingredients:

Milk - 1 litre

Apple - 1

China Grass - 20 gm

Milkmaid - 400 ml (1 tin)

Sugar - 5 tbsp

Vanilla Essence - 1/2 tsp


Method:

1.  Boil milk in a vessel.

2. Take 1/2 cup of the boiled milk, soak the finely cut china grass bits, close the vessel with a lid and keep aside for half an hour.

3.   In a heavy bottomed vessel, add the rest of the boiled milk and the china grass soaked milk and mix well until combined and no crystals are left.

4.  To this, add milkmaid and sugar and bring to a boil keeping on medium flame.  Mix well and switch off flame.  Allow to cool.

5.  Chop the apple into fine pieces.  Dip in salt water, remove immediately, and add to the pudding mixture.  Mix well until combined.

6.  Add vanilla essence and stir well.

7.  Pour in a flat tray and allow set in fridge (not in freezer) for 1 to 2 hours or until set.


To Make Praline:

Sugar - 1/4 cup

Cashewnuts/Almonds - 6 or 7

Heat sugar in a kadai on a low flame for a minute.  Do not add water or do not stir.  When it turns dissolve and turns golden brown, add the cashewnuts and mix.  Immediately pour on a wooden plank or a plate greased with oil.  Allow to cool and harden.  Break into pieces and powder coarsely in mixie.

To Serve:

Scoop the set pudding in serving cups, sprinkle the coarsely powdered praline on top, and serve chilled.


My Notes:

Set pudding in individual cups/bowls, sprinkle praline on top, and serve.